ESSENTIAL TOOLS
A long-awaited blogging guide. Images are essential to any blog and give the blog appeal. Everyone is attracted to nice photos and sometimes (or most of the time) the camera isn’t able to capture the “scene” properly. So here is my guide to the essential Photoshop tools without going into the technical details. I’ve been using Photoshop since 2003 so when I was 13. Taught myself how to use it and I know the tricks of it. The Photoshop version I have is CS2 and I use this a lot. I’ve got CS6 on my work Macbook Pro but I’m still in the learning process of how to use with its new features and with it being a big jump from CS2.
Setting up your Photoshop work space is important. Everything you use often needs to be in your workspace. I never use to have a history panel but it’s proven to be very useful. Always have what you use often on your workspace
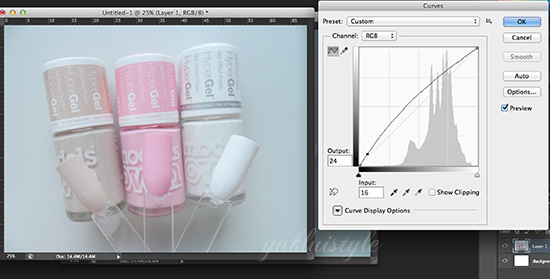
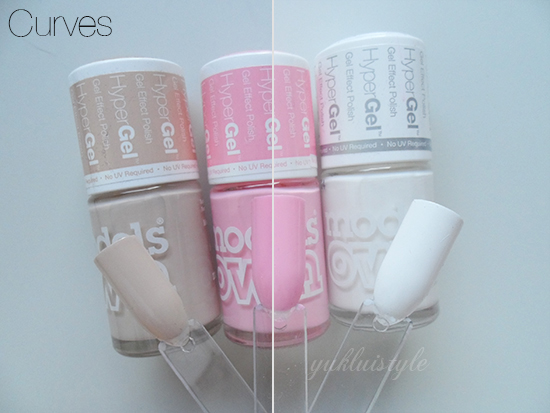
Curves is one of the best photoshop tools out there. You can lighten or darken the overall image taking the tones and contrast into account. I’ve always used it lighten an image. To find curves, it’s Image > Adjustments > Curves. When it is loaded. it is a straight line. You’ll just have to click onto the line and move upwards to brighten up the image or move downwards to darken the image. You can always readjust the point before you press OK. You can always add more than one point but I’ve always had a maximum of 2 each time.
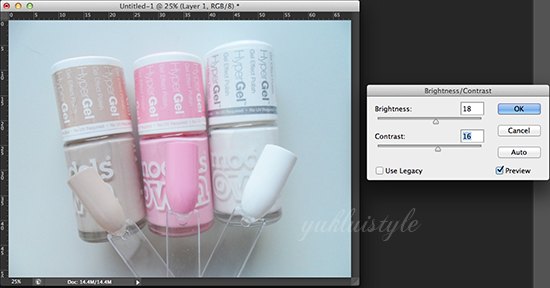
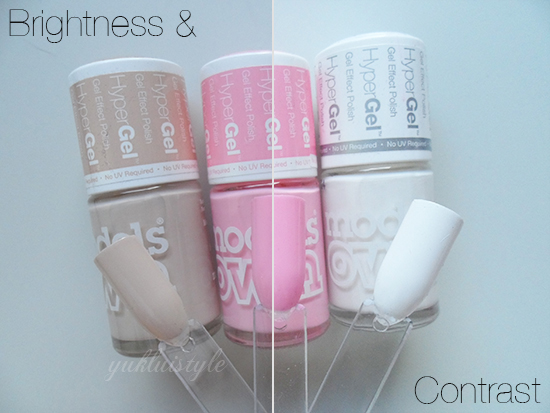
Brightness and contrast is another way of brightening an image. The default values are 0 and you just move the sliders left and right. This isn’t one of the best ways to brighten an image as brightness brightens the whole areas of the image without taking tones and contrast into account. However you can add contrast to an image. I would try and limit the use of this as it can be too much but be cautious. Find this in the same area as Curves.
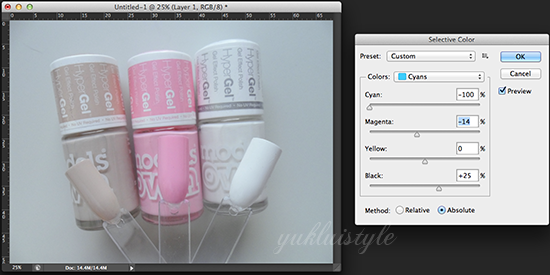
Sometimes an image can be one colour dominant depending on your camera settings. Mine tends to be cyan/blue dominant. I always use selective colour as it is very helpful in removing a certain colour or enhance or change a colour especially swatches. This is in Image > Adjustments > Selective Colour. To use this, choose a colour you’re wanting to play with in the drop down list then adjust the sliders. As the default values is 0, going into the negative values is to remove colours, whilst being in the positive is adding colour. Just experiment with this and play around with the values. I always use the ‘Absolute’ method.
You have got to be careful with this as a certain colour will affect similar colours. E.g. removing the cyan will have an effect on removing other colours like turquoise. Keep a sharp eye if you have a busy image as it can be quite temperamental.
Tip: If you’re going to use this, always duplicate your image which will become a new layer. Work on that new layer and you can erase the unwanted areas selective colour has adjusted.
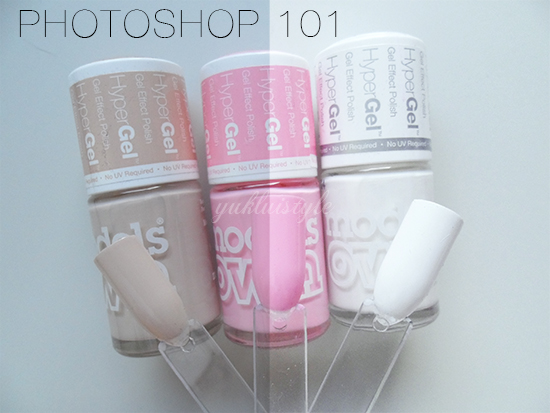
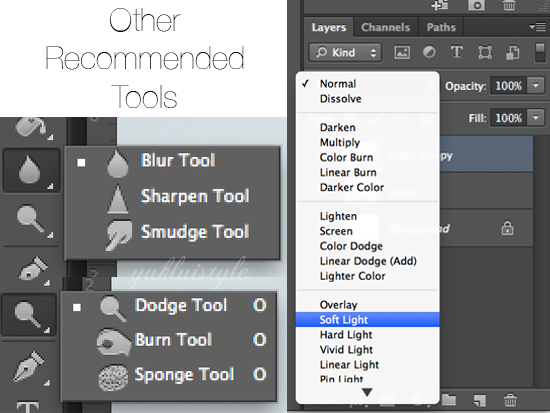
The image above shows other tools that I highly recommend. Sharpen, Dodge and Burn will be used more often than you think. Sharpen speaks for itself. As with Dodge, you can use it to lighten a certain area of an image and Burn is to darken. Within your layers tab, there is a drop down list where the default value is “Normal”. If you click on it, there is a lot of options and these are blending modes. Whichever value you choose, it will be applied to the layer you’re working with. “Soft Light” is the one I always choose.
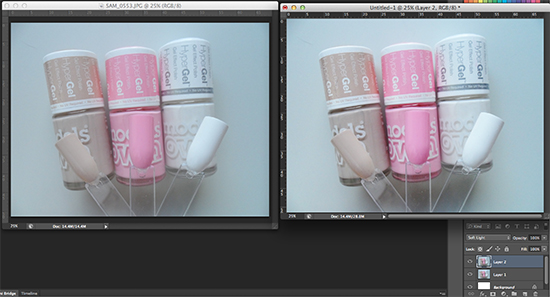
In order to use this, I always duplicate the image layer, then apply soft light and it will enhance the image. I will always use this after I have adjusted the image accordingly. Then will change the opacity of the layer and erase some areas. Sounds complicated? You’ll get used to the idea of layering etc. Below is a before (left) and after (right) of the blending option.
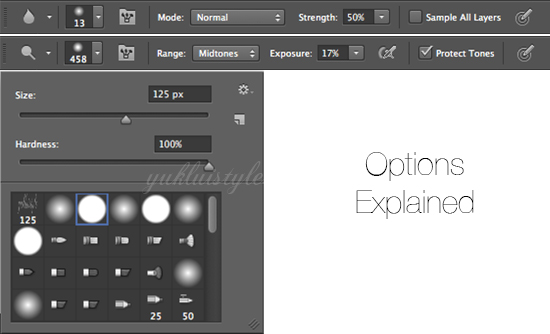
Whatever tool you choose, there are always options for you to configure. Strength, exposure, opacity (not pictured) can be thought of how strong you want to tool to be. Hardness is an option in the brushes and it is only available when you choose round brushes. Hardness is how crisp you want the edge of the brush. The higher the percentage, the crisper the edge.
My routine for editing always is:
Resize image, Curves, Brightness & Contrast, duplicate image, Selective Colour, Selective Colour again, duplicate the current image, dodge areas, burn if needed, sharpen areas, duplicate the current image, change blending mode to Soft Light, lower the opacity, erase certain areas, add watermark and save. Phew. And I end up with:
Sometimes the image may be difficult to manipulate therefore I end up taking the photo again and change the camera settings.
Hopefully, this gives you an insight into what the necessary Photoshop tools are. I’m not sure if this post turned out as what I had expected and probably went straight into the deep end. We all know that using Photoshop can lead to extreme editing which we’ve all seen. I dislike using Photoshop for that. If there are any questions, feel free to ask and I will answer them. Feel free to email me too. I can always do another Photoshop post later on. Do let me know.


now i know how people have pretty picture 😛
Hun, this is so helpful and detailed, thank you!
LIVE.IN.LOVE
~
Great explanation !
I'm using CS5 so I'm not too sure about CS2 but I love toggling the red, green and blue curves, it gives a nice effect to the photos. Just click on the RGB drop down and you'll see it (^^)
http://itsme-hanie.blogspot.com
Such a great post I'm really rubbish at photoshop but might try again
AliceMegan
You make it sound so simple!! Think I may need to give it another go…
I never tried Photoshop…I'm too dummy!
Thanks for the tips – I love this! 😀
I'm following you now on Bloglovin'! xx
– C:ndy
Good tips with the cures, I use this rarely, because I simply always forget. I almost only use contrast and selective color… will try to use curves next time. 😀
Thank you, Nicol!
gig love <3
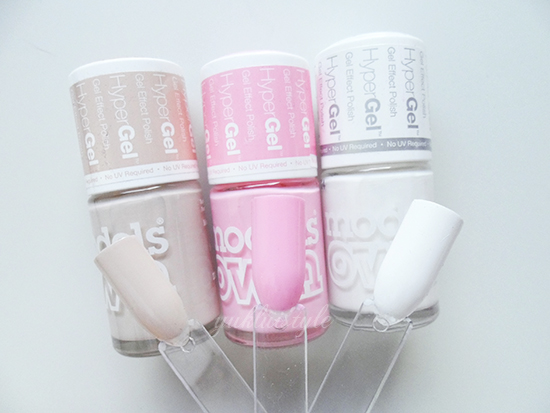
wow, this is a great tutorial. very easy to follow and understand! 🙂 I really like the nail polishes too btw! 😀
Thank you so much for that post 🙂 I was always looking for a detailed post likes yours but the most don´t talk about it.
I don´t know how many bloggers I asked about there process.. and not one of them did answer me.
So THANK YOU…
xoxo, Daniela